Step by Step Guide
1
Create a Workspace
Sign in to MCP Hive and navigate to your workspaces management dashboard.Create a new workspace by clicking the
Create New Workspace button. Workspaces help you organize and manage your hives in one place.2
Add Hives
Click on
Add Hive button and select the hive you want to add to your workspace. You can search for a hive by name or description.3
Configure Authorization
Click on the
Configure button against your hive. You can authorize the hive or configure the base URL of the underlying services.We support OAuth2, API Key as well as HTTP Bearer Token authorization.4
Install as MCP Server
Click on the
Install button against your hive. This will open an installation command interface where you can: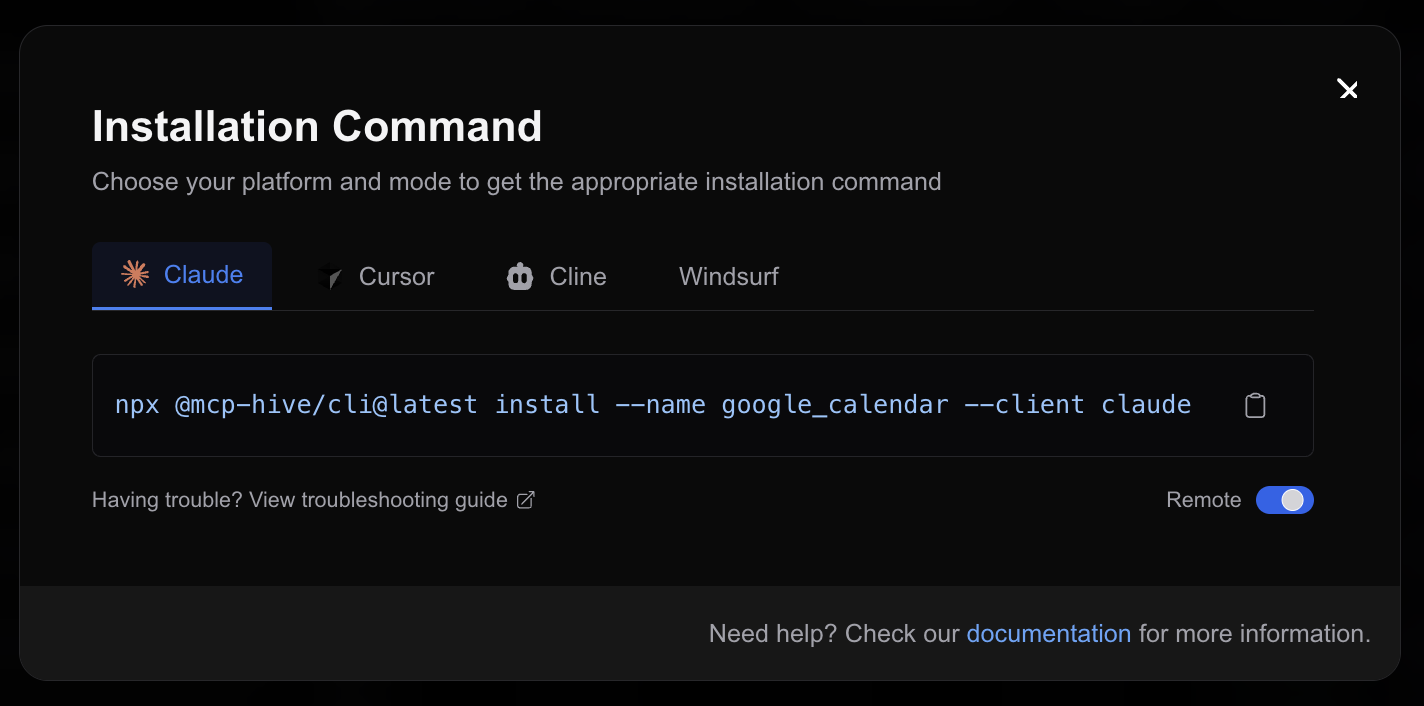
-
Choose your platform:
Claude,Cursor,Cline,Windsurf -
Select execution mode:
Local,Remote
In local mode, the hive will be running on your machine unlike remote mode where the hive runs on MCP Hive’s servers. This is recommended for MCP servers that need access to your local machine like obsidian, filesystem, etc.
-
Copy the generated installation command (e.g.,
npx @mcp-hive/cli@latest install --name google_calendar --client claude) -
Run the command in your terminal. When prompted for an
API Key:- Click on your profile menu
- Select “Manage API Keys”
- Generate a new API key if you don’t have one
- Copy and paste the API key into the terminal
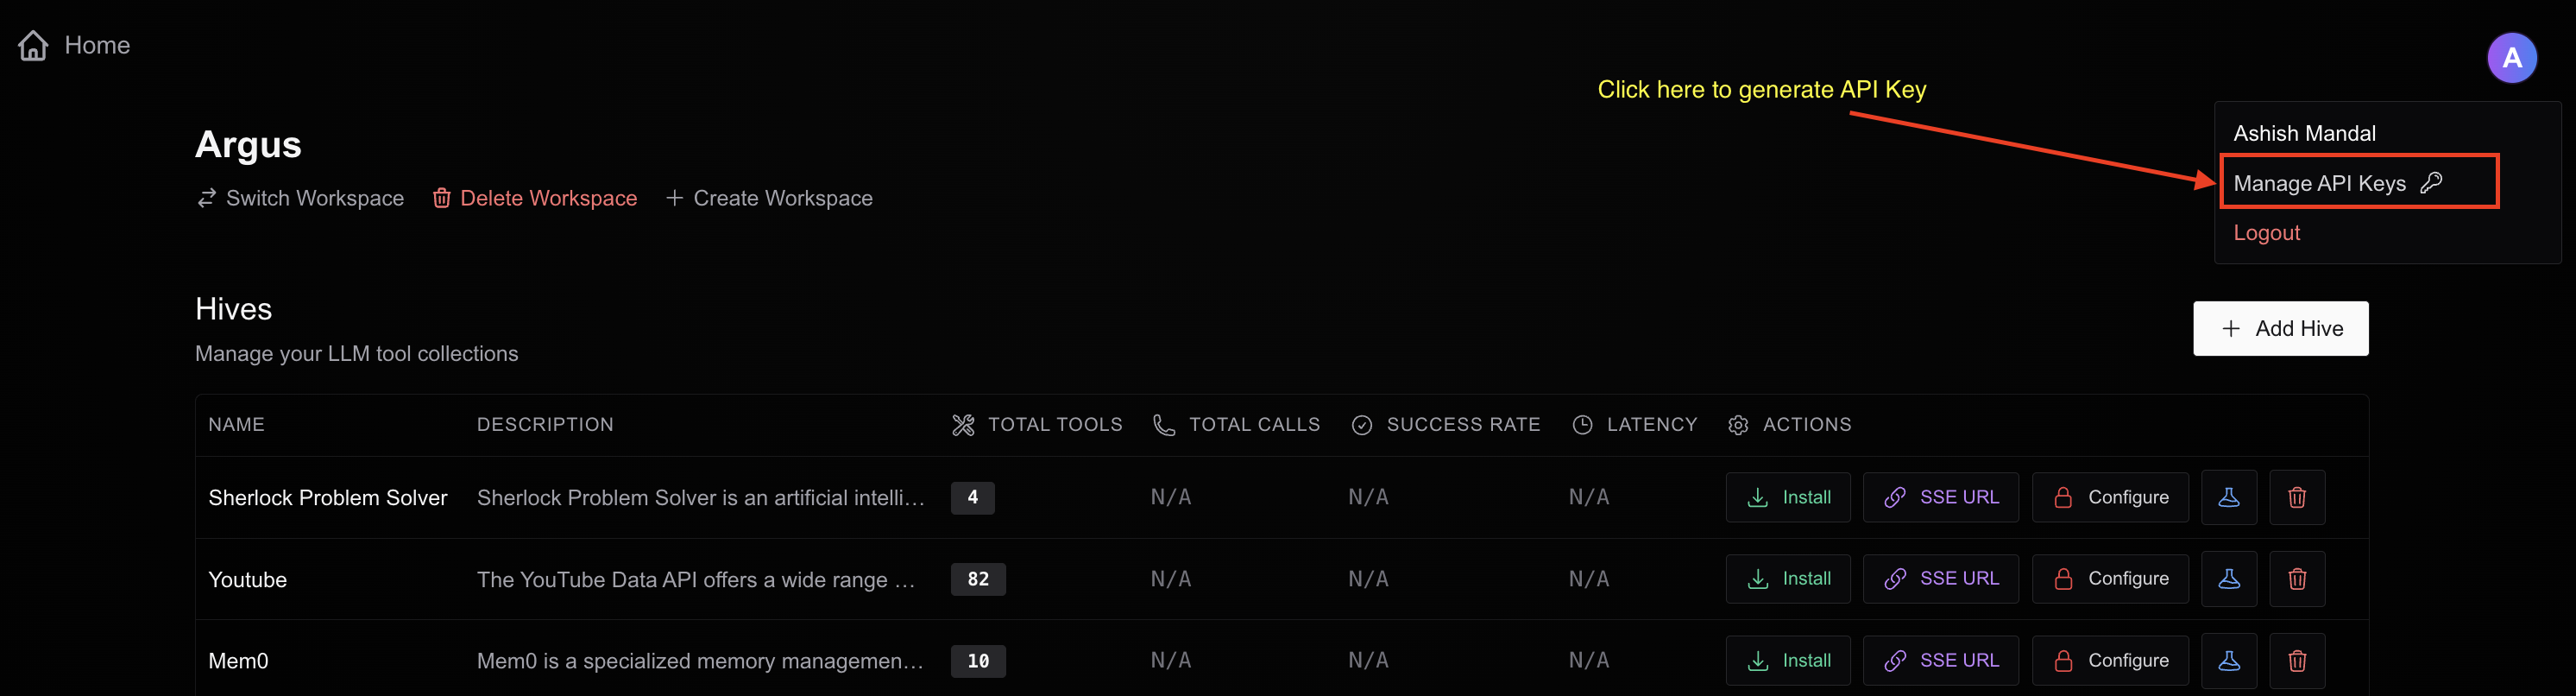
API Key is now required to access Hive as an MCP server irrespective of the execution mode.